Our flagship project Seekers Notes has been on the leading edge of the mobile game market for 5 years now. Players all over the world explore the mysterious world of Darkwood every day. Have you ever wondered how exactly the locations for Seekers Notes are created, and how much work goes into each beautiful and atmospheric scene? Today we are going to share the process of creating hidden object locations, using the Perfumery as an example.
We used a combination of 3D animation and Spine animation to create the Perfumery location for update 1.30. Players really liked the animated parrot, so we decided to add more animals to new locations.
Development stages of the Perfumery
From Idea to Release
Seekers Notes has more than 70 locations with unique details and a realistic flair. The player doesn’t just see a beautiful scene, but is plunged into an unforgettable atmosphere where gameplay is satisfying and fun. All MyTona game artwork is created exclusively by our artists and animators—we don't outsource any of it.
In this article, we will lay out the steps involved in creating hidden object locations. The process can be divided into the following important stages:
- Idea
- References
- Sketch
- 3D Modeling
- 2D Rendering
- Animation
- Hiding Objects
- Implementing and Testing the Location
- 1. Idea
There are a number of rules to follow when implementing any location in a game. The content designers discuss possible options for new backgrounds with the writers and lead artist. The most important rule is that locations should not repeat, and they must adhere to the game setting.
We come up with ideas for possible locations that fit the event theme. There are some holidays that demand updates and cannot be ignored (Halloween, Christmas, Chinese New Year, Hanami—a cherry blossom festival in Japan). If there are no major upcoming holidays, then we can let our imaginations run wild and show the players new mysterious corners of Darkwood, or create a location that is closely connected to the current season.
- 2. References
What does it mean to collect references? We create a special document where the future location's overall appearance is outlined. This document contains a lot of visuals for our artists, as well as brief comments stating what details they should pay attention to, what might serve as a source of inspiration, and what atmosphere to strive for.

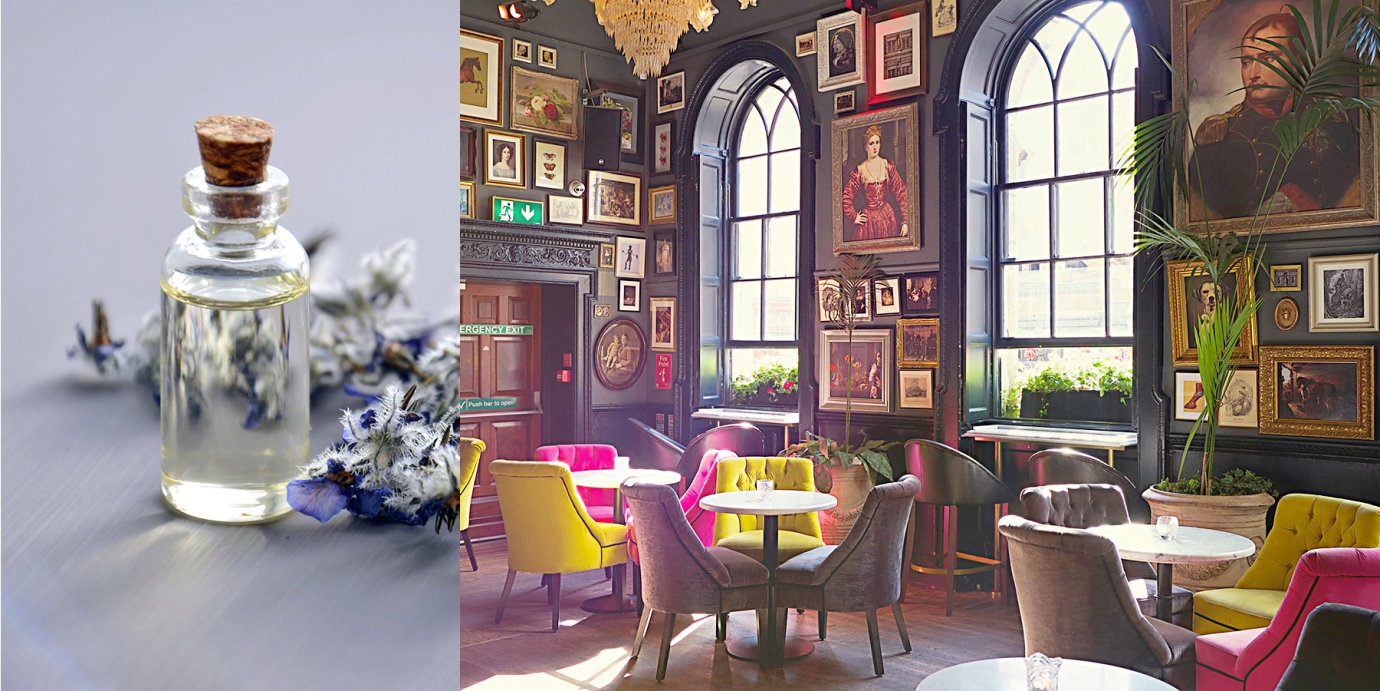
References for the future location
- 3. Sketch
Our artists create several draft versions of the location based on the references—these are the sketches. Next, we choose the one with the best visual appeal and functionality. Composition, angle, and perspective all affect the choice.
The team then works on adding details to the final sketch, plus plotting the lighting and the aerial perspective. Potential animations are also planned out at this stage. The sketch stage helps us gain a clear vision of what the final result will look like, and it also makes the 3D modeling work much easier.
The final version of the sketch is black and white. At the next stage, the 3D artist will add color, closely coordinating all the details with the lead artist.

Perfumery sketch
- 4. 3D Modeling
After the sketch comes the 3D modeling stage, where the drawing is rendered with three-dimensional graphics. Basic architectural rules are followed during modeling. The size of objects in the location corresponds to their actual size.
In the 2D sketch, the 2D artists provide the basic shapes without details. The 3D artists then flesh out every detail on their own. This can include ornamental plasterwork, patterns on wooden objects, wallpaper prints, and much more. These details require the artists to carefully study the style of the era the game is inspired by, as they are what convey the atmosphere and spirit of the time.
All scenes are compiled in 3ds Max, and the location is rendered using a plugin for realistic visualization. Another special plugin that lets us create coniferous and palm trees, flowers, or any other vegetation is used for modeling and animating plants.
When we create textures, we use programs that let us work with finer details. For example, sometimes we want to make objects look worn and aged. Details like these add realism: things like a dusty mirror or a cobweb can make a location look deserted.
Sometimes statues of animals and people are added to the scenes to enrich the game’s atmosphere. Sculpting requires not only in-depth knowledge of the tools involved, but also artistic skill.
When the location is complete, special effects are added as a finishing touch to make the location’s atmosphere more immersive. Several passes are required for the final rendering.
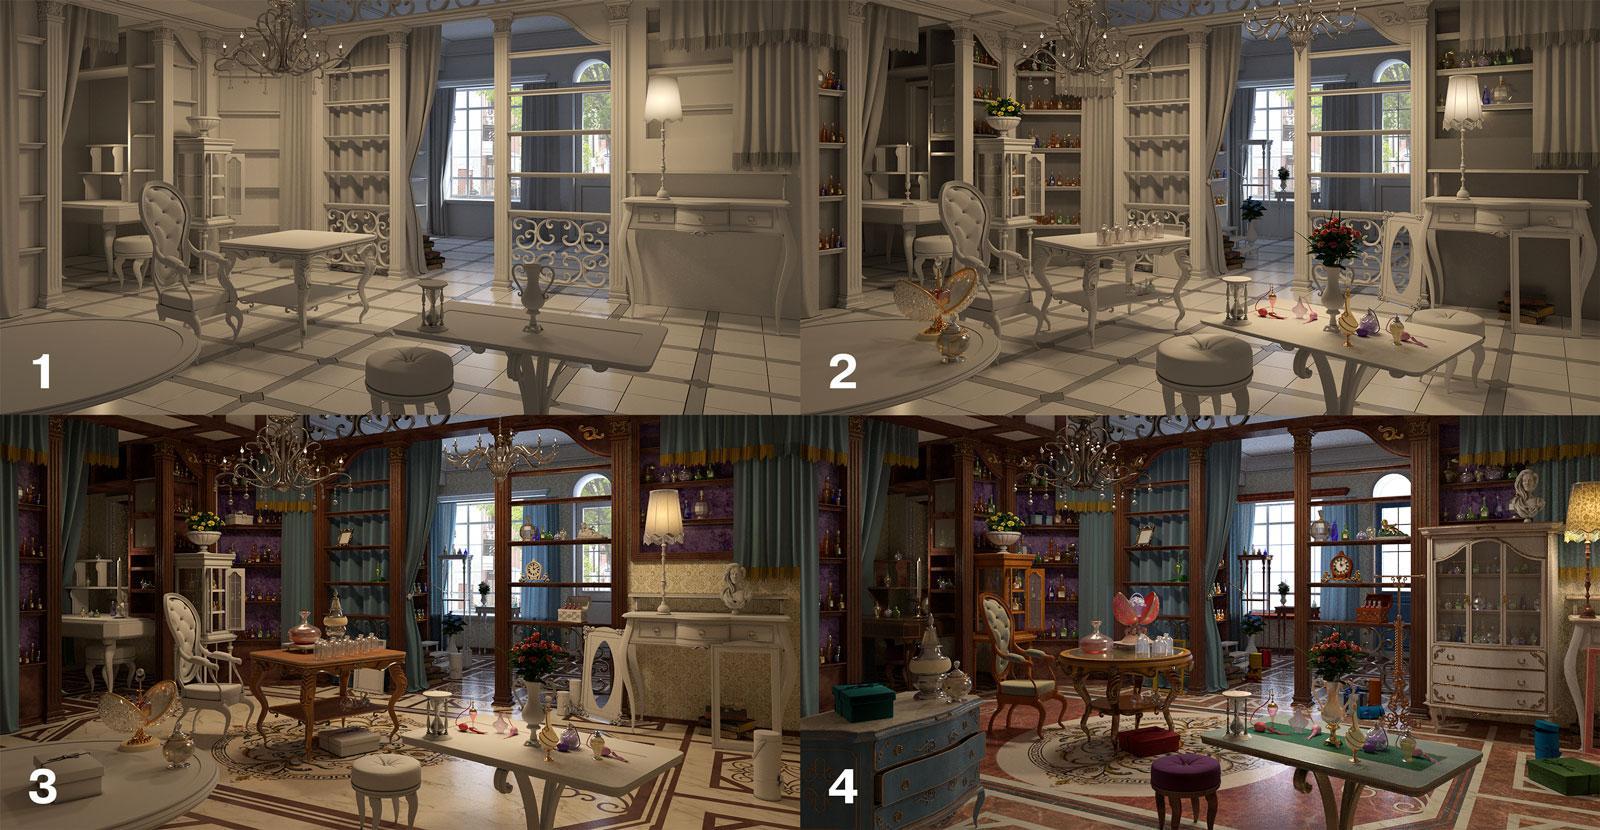
3D rendering of the Perfumery
- 5. 2D Rendering (overpainting)
The next step is 2D rendering (overpainting). At this stage, textures are carefully finalized, locations get aerial perspective and smoothness, and objects disappearing into the distance are made less saturated and detailed. The location begins to look more lifelike and natural. Here, with the help of some new details, the scene really comes to life. A handkerchief, a tossed-aside newspaper, or a lively parrot are significant details that work to enhance the atmosphere and make the world appear more lived-in.
The rules of 2D rendering aren’t very different from the rules of traditional drawing. For example, the distant objects in a location should look lighter and less saturated, and closer objects should be more vibrant and higher-contrast. Pure black and pure white should be avoided in the artwork (except for the single brightest flare or source of light), and there should be no dark areas in a location: every corner should always be visible, even on a dimmed screen.
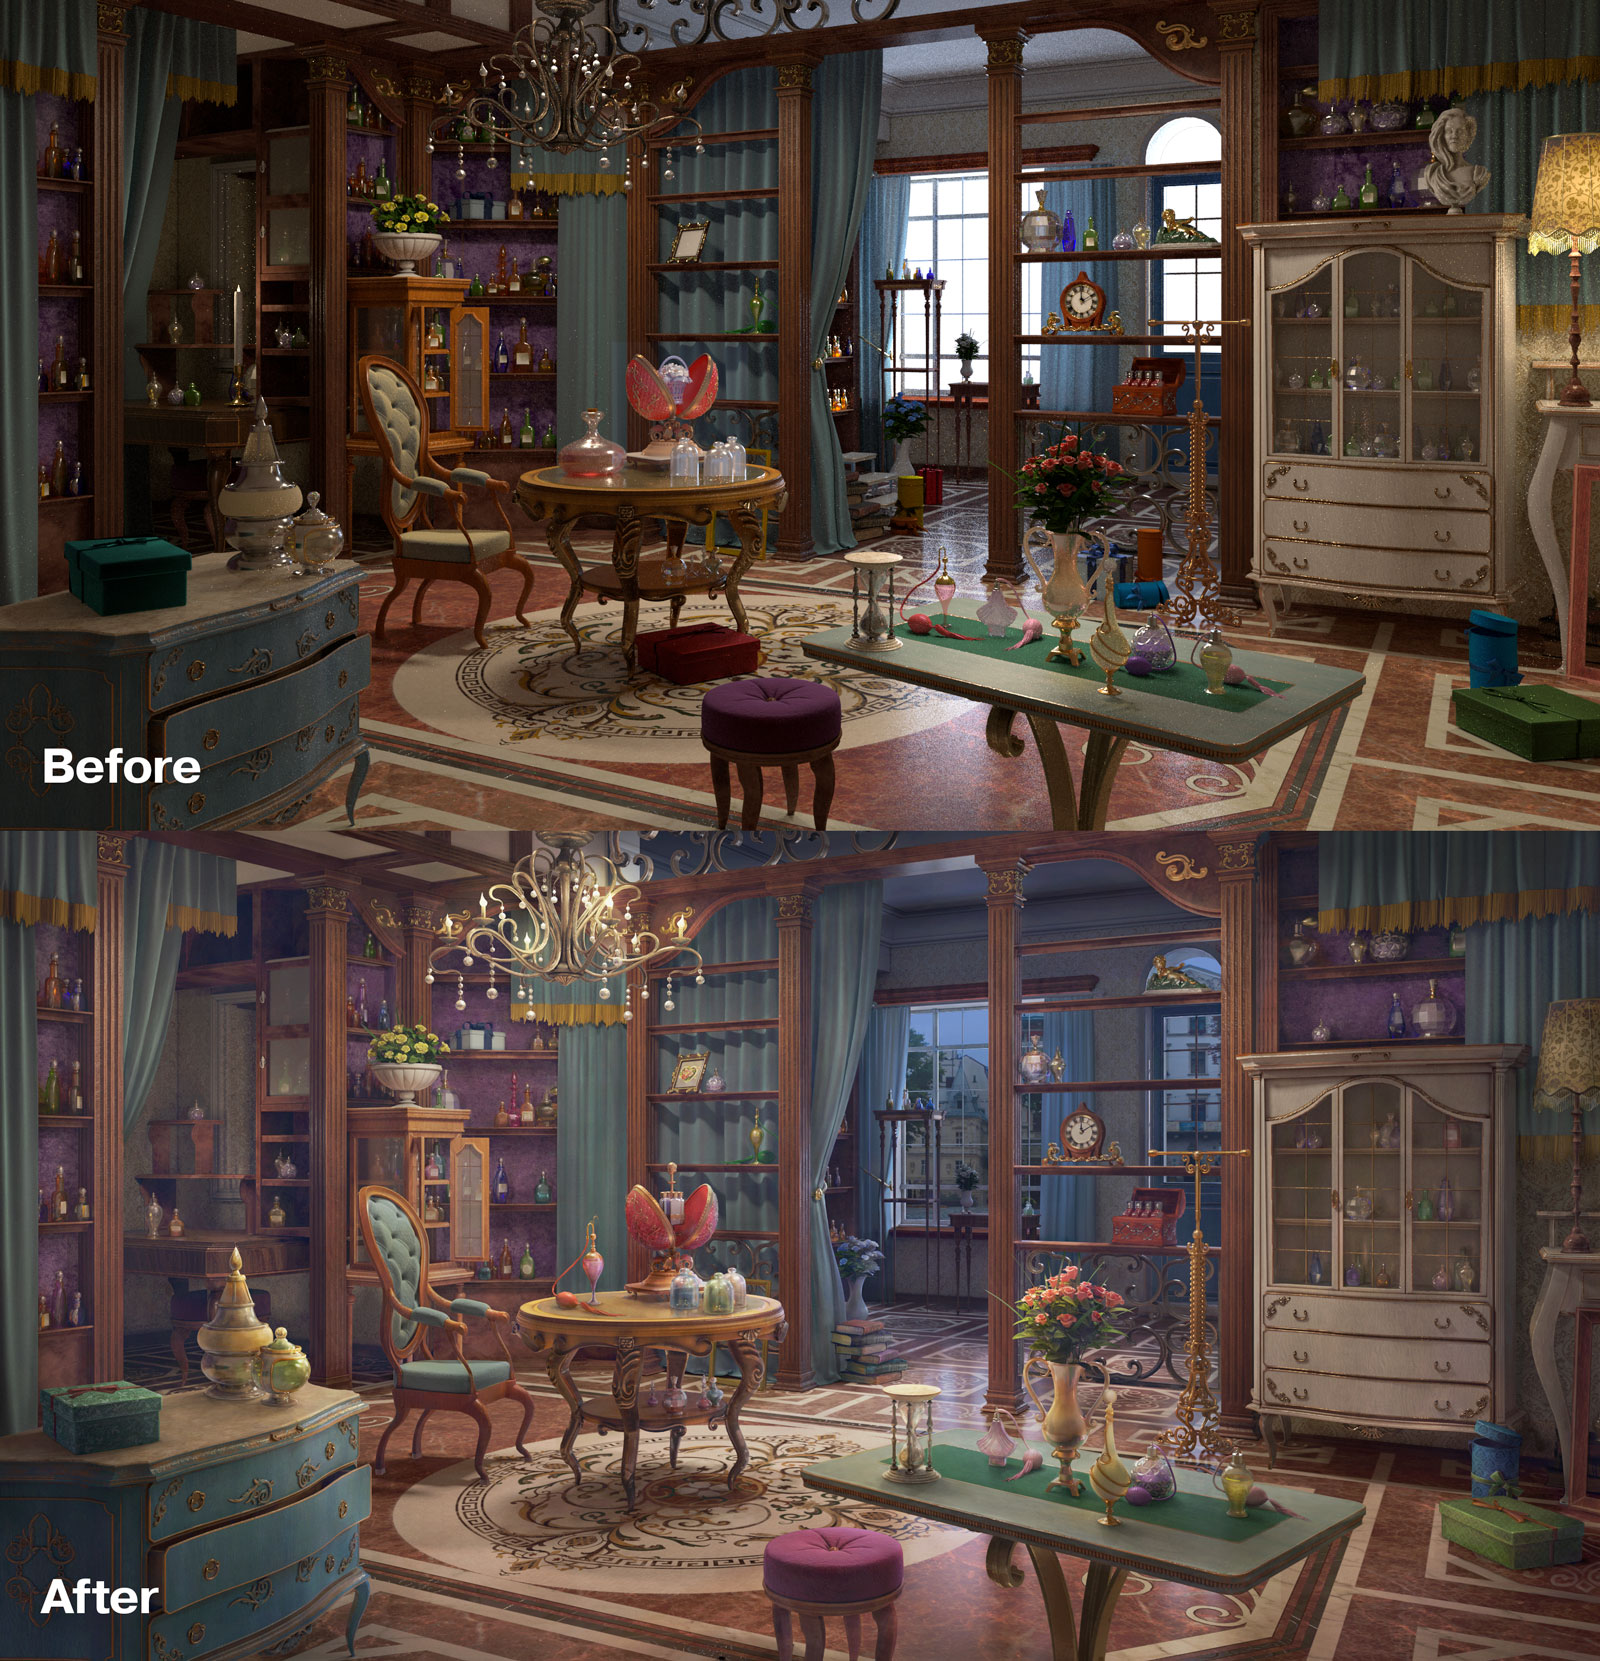
Before and after 2D rendering of the Perfumery
- 6. Animation
Next is the animation stage. We always keep in mind that animation shouldn’t be overloaded with movement. The main goal is to maintain realism in the artwork and immerse the player in the world, rather than show them a painting. The simplest way to liven up a scene with animation is to add dust, snow, rain, leaves, or programmatic transparency changes, for example, animating rays of sunlight coming in through a window.
The process begins with getting all the artwork prepared for animation and sending it to the animators or programmers. The most important rule to follow during animation is that the animation layer can’t cover any hidden objects. However, semi-transparent effects may be placed on top of all layers—these don't prevent players from collecting the object when tapped.
We use four types of animation:
- Animation in Spine (objects, characters and most effects)
- Particle animation (done in our own MParticle environment)
- Frame-by-frame animation, which is usually complex animation requiring elaborate mechanisms or rotation of an object (created by 3D artists and rendered frame-by-frame)
- Programmatic animation, which is used for the simplest effects, like glowing lamps or the slight sway of an object
- 7. Hiding Objects
Once animation is complete, the hiding stage begins. This is when the artists hide the objects the players will eventually search for. This stage also has its own rules: Hidden objects need to be different from the objects that fill the scene itself. It's also important to remember that the visible part of the object should be easily recognizable.
Another thing to note is that there are several search modes in the game that each impose their own rules and restrictions. For example, a location can't have both a ball and a watermelon because they would look identical in Silhouette mode, which would negatively affect gameplay and must be avoided.
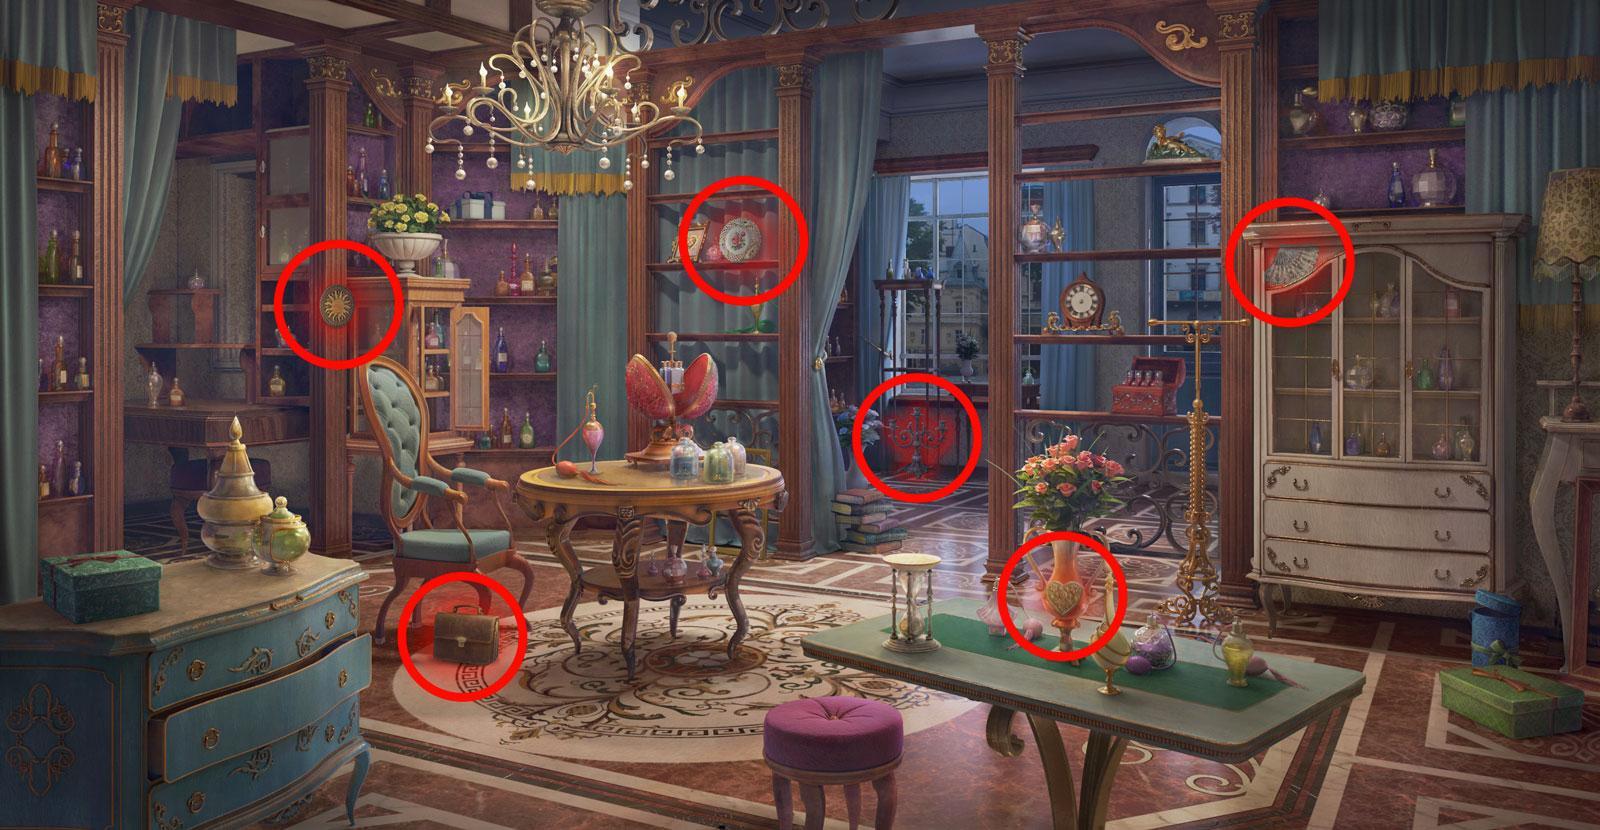
The room filled with hidden objects
In Seekers Notes, the same hidden objects can be in many different positions in the same location. This ensures that the player never gets bored of playing the same location, even if the items are repeated over and over again, since they are always hidden in different places.
- 8. Implementing and Testing the Location
What comes after hiding the objects? The final stage: implementing the location in the game.
To ensure locations are implemented quickly and correctly, our programmers developed useful tools for themselves and the artists, including an Adobe Photoshop plugin. This means the implementation and testing stages don’t take very long.
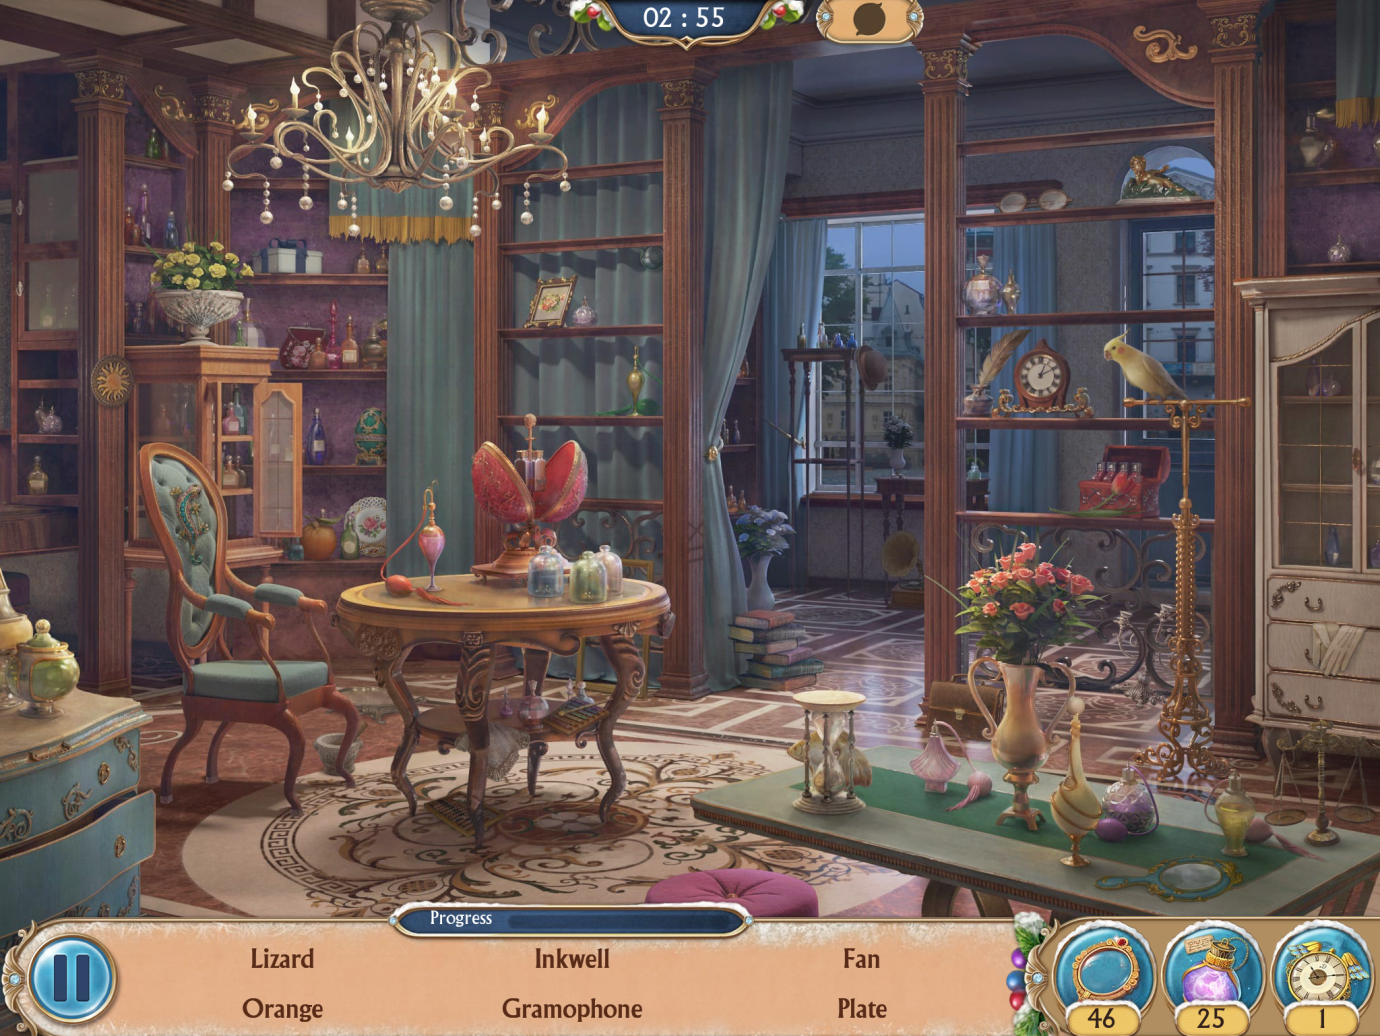
The location in the game
We hope you enjoyed reading about our experience creating hidden object locations for Seekers Notes. Now you know how much work and effort the team invests in each location. We do our very best to ensure that our players enjoy playing the game to the fullest. We are always improving locations, making them even more beautiful and immersive with each update.
Join the MYTONA team and create unique worlds!